This article will walk you through configuring your practice's auto-responses, which helps you set client expectations based on when the chat is started.
![]()
Video: Location Hours and Auto-Response Workflows
Auto Responses send a specific message to your client when their conditions are met. There are auto-responses for a chat started during your listed open hours, one started after hours, and one started during off-hours. Each of these types of auto-responses can be used for all case types, or you can break things down by case type and have a different response for each one. There is also an auto-response for cases started while you have set yourself to be out of the office and an auto-response that can reply to the pet parent if they haven't received a response from a practice staff member after the length of time you set. Each of these options will be covered step-by-step below.
Most of the auto-responses are determined by the hours that you set in Location Settings, so we'll go over that first.
Step-by-Step Instructions - Setting Practice Hours
Step 1: Log in to the Anipanion web app.
Step 2: Click on the Settings tab on the navigation sidebar, then on the Location sub-tab.
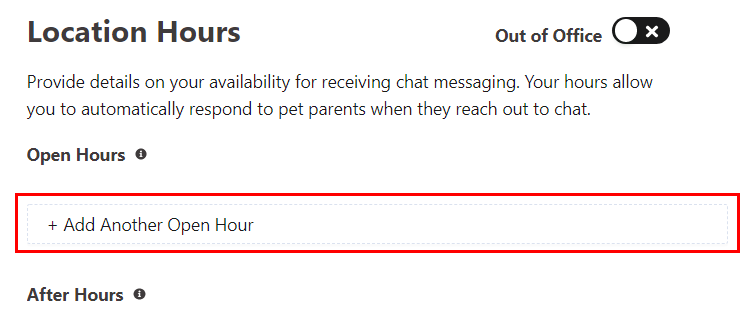
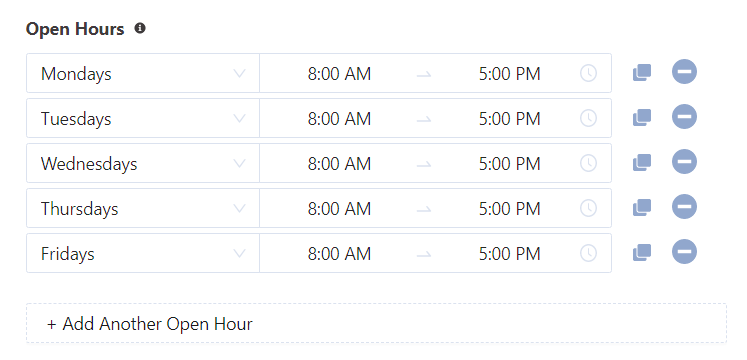
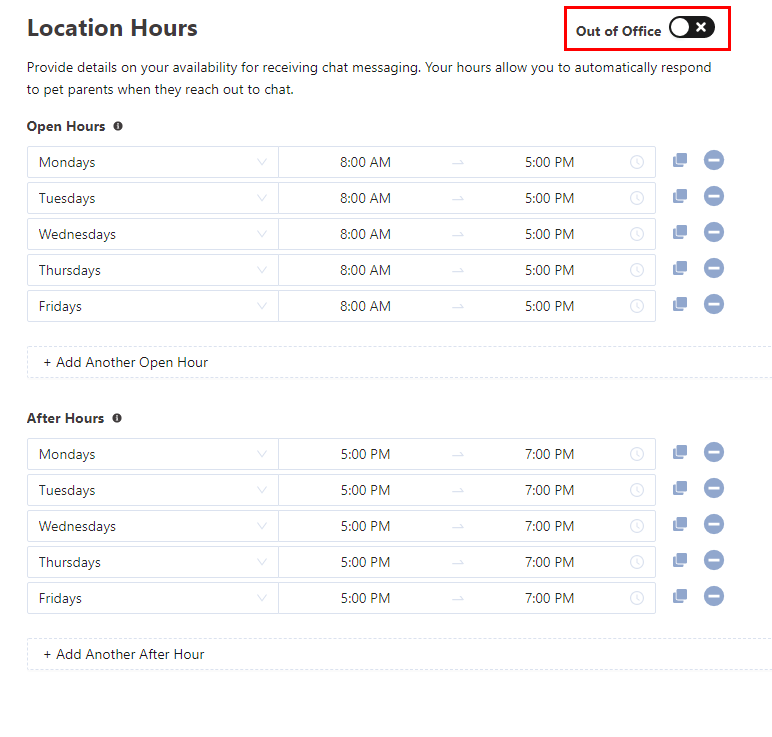
Step 3: On the right-hand side under Location Hours, start setting a time block that indicates your practice's open hours. Open hours are intended to be times when your staff is available to respond to telehealth chat requests. Begin by clicking on Add Another Open Hour.
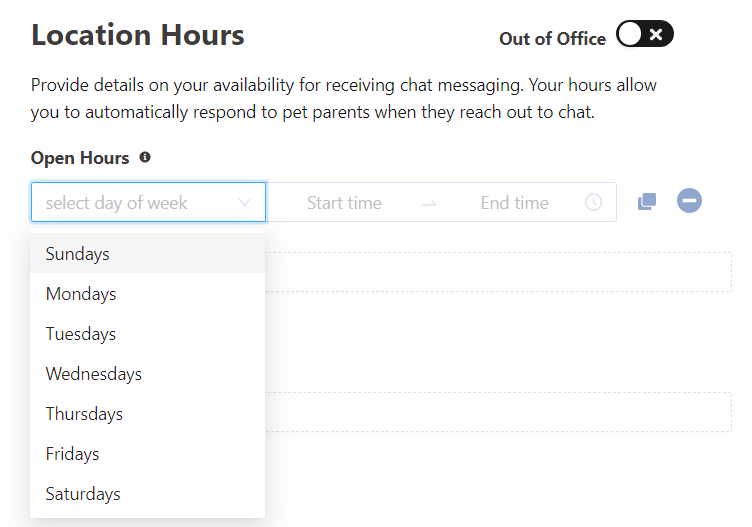
Step 4: Select a day of the week for your open hour time block.
Step 5: Set a starting time.
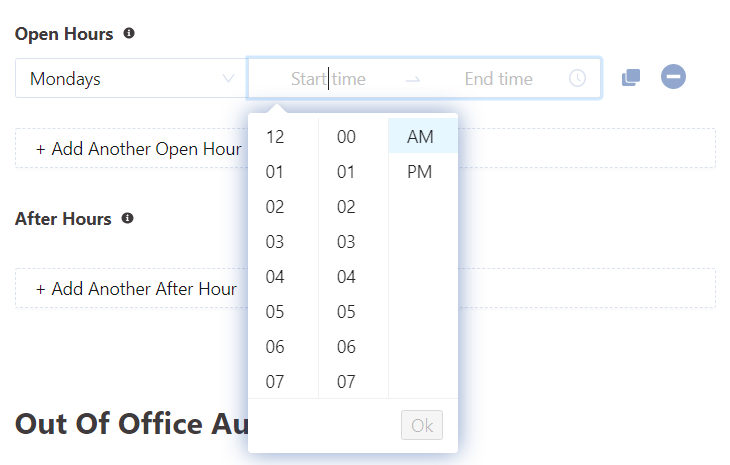
Step 6: Set an ending time. Make sure to click on OK after selecting the ending time.
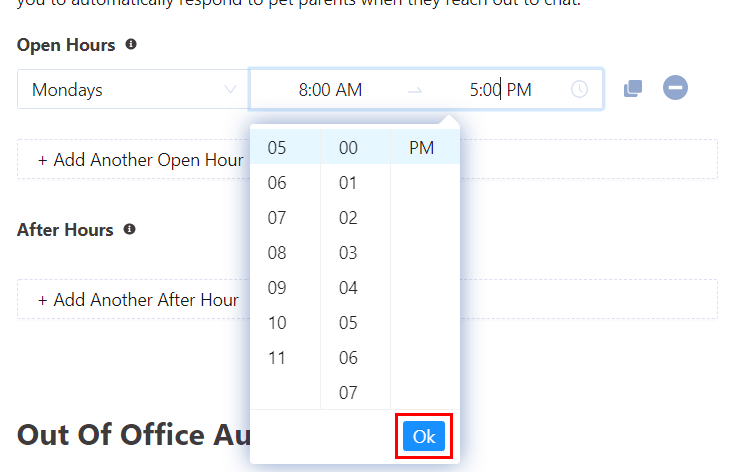
Step 7: Repeat steps 3 - 6 to add more blocks of open time. As long as they don't overlap, you can add as many time blocks as you want.
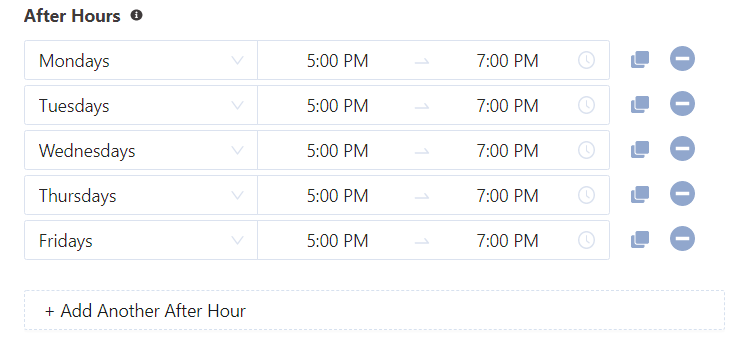
Step 8: Repeat the same process of adding one or more time blocks under the After Hours section. After-hours are intended to be times when you have reduced staff, higher prices, or otherwise altered operations compared to your open hours. Typically, after-hours will be in the evening after the open hours are ended, but they don't have to be.
Step 9: Review your listed hours to make sure they are accurate. It is recommended that you refresh the page before double-checking to make sure all of your changes are saved. These hours will be shown to your clients using the Anipanion Pet app. Any hours outside the times you set for Open Hours or After Hours are considered Off Hours for auto-responses, which will be covered later in this article.
Step-by-Step Instructions - Setting Open Hours Auto-Responses
Step 1: Log in to the Anipanion web app.
Step 2: Click on the Settings tab on the navigation sidebar, then on the Location sub-tab.
Step 3: Look at the bottom-right section of the page to find the Auto Response Workflows section. You may have to scroll down to see it.
Step 4: Click on the toggle switch on the top right of the Open Hours - All Cases auto-response.
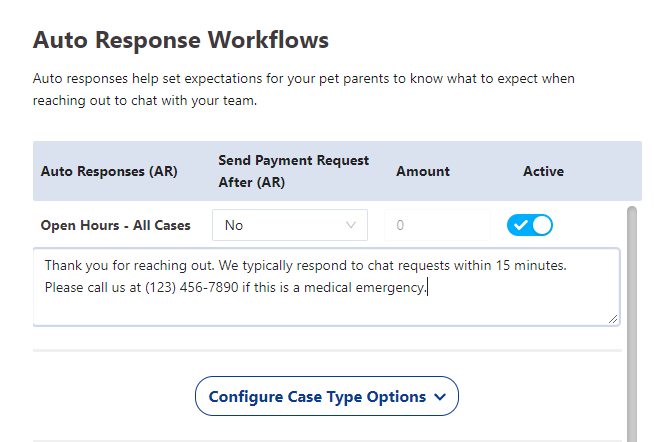
Step 5: If needed, edit the text of the Open Hours - All Cases response. This message will be sent to any pet parent who starts a chat with any case type during the open hours times you set under Location Hours.
Step 6: Optionally, you can set the Send Payment Request After (AR) to Yes to enable an automatic payment request. If you do, pet parents that trigger the auto-response will be sent a payment request for the amount you set immediately after the text of the auto-response. This can be used to collect payment for the chat consult before any staff member spends time advising the pet parent.

Step 7: If you want to have different auto-responses based on the case type that the pet parent chooses when submitting their case, click on Configure Case Type Options to expand the auto-responses for each case type. If you want all cases to have the same response during open hours, you can skip the rest of the steps in this section.
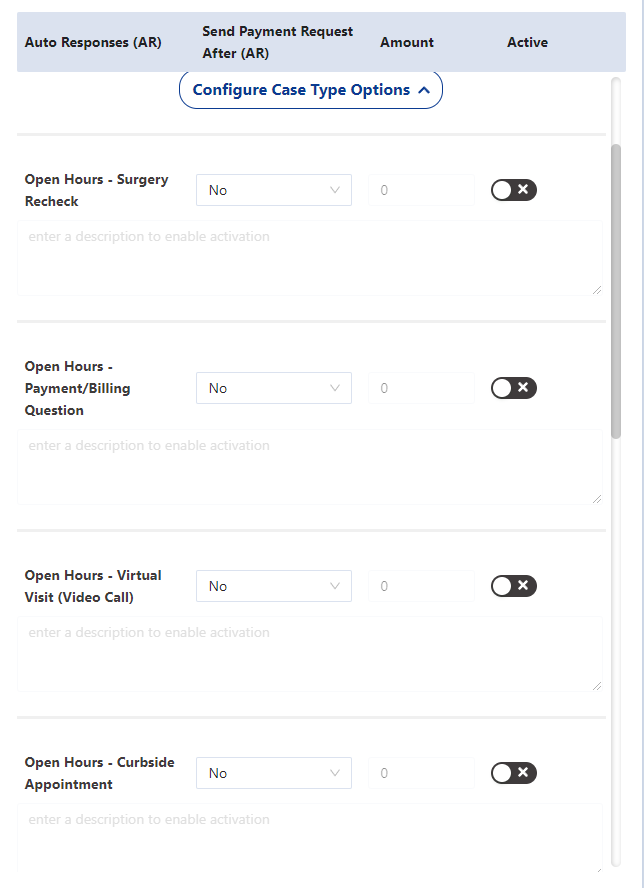
Step 8: Enter auto-response text into the description box under each case type that you want to be different from your all-cases response.
IMPORTANT! If you have any case-specific Auto-Response toggled on, it will be sent instead of the All Cases auto-response when a pet parent starts a case of that type!
Step 9: Click on the toggle switch for each case-specific auto-response you want to enable.
Step 10: If needed, set whether a payment request will be sent and how much it asks for. You can do this for each case type.
Setting After-Hours or Off-Hours Auto-Responses
Follow the same steps as in the above section on open-hours auto-responses, just with the after-hours or off-hours section.
Step-by-Step Instructions - Setting the Out-of-Office Auto-Response
Step 1: Log in to the Anipanion web app.
Step 2: Click on the Settings tab on the navigation sidebar, then on the Location sub-tab.

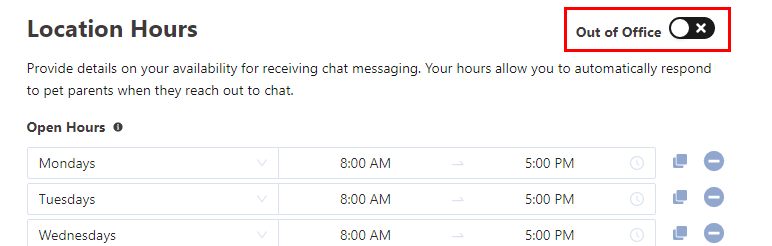
Step 3: Look at the right-hand section of the page to find the Location Hours section. There is a toggle switch at the top right of the section, as well as an Out-of-Office Auto Response section below the off-hours options in the Auto-Response Workflows section.
Step 4: To start the process of setting your practice as out of office, click on the toggle switch on the top right of the Location Hours section. If you just want to set the text for the out-of-office message without setting your practice as out-of-office, skip this step as well as Step 5.
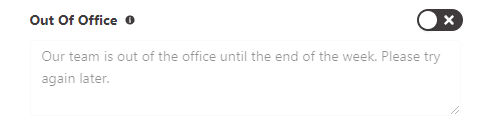
Step 5: Select a date and time for your practice to be back online. From the point that you toggle on the Out of Office switch until the time you select, any chat started by a pet parent will receive the message entered in the text box under the Out of Office heading instead of any other auto-response they would normally receive. You can also toggle off the Out of Office switch manually.
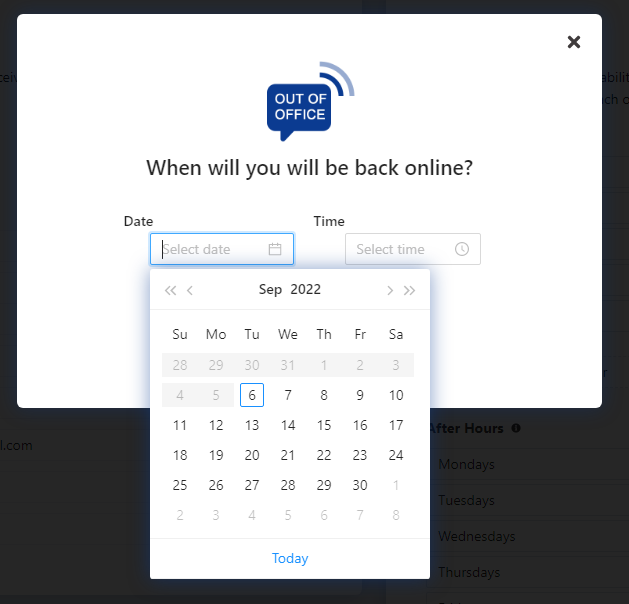
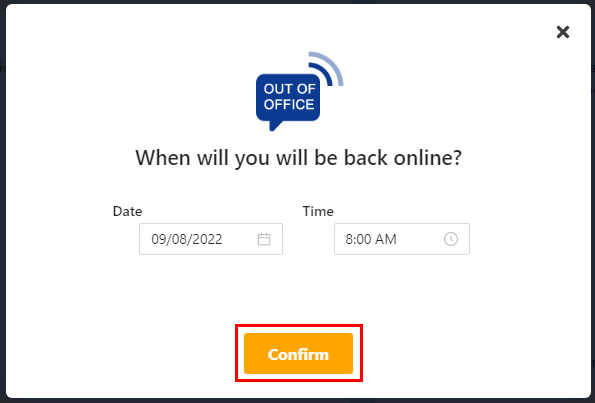
Step 6: Enter the text of the Out of Office response. This message will be sent to any pet parent who starts a chat until the out-of-office toggle is switched off again.
Step-by-Step Instructions - Setting the No Response Auto-Response
Step 1: Log in to the Anipanion web app.
Step 2: Click on the Settings tab on the navigation sidebar, then on the Location sub-tab.
Step 3: Look at the bottom-right section of the page to find the Auto Responses section. You may have to scroll down to see it.
Step 4: Scroll down to the bottom of the Auto Responses section and click on the toggle switch on the top right of the No Response section.
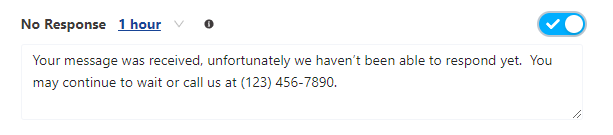
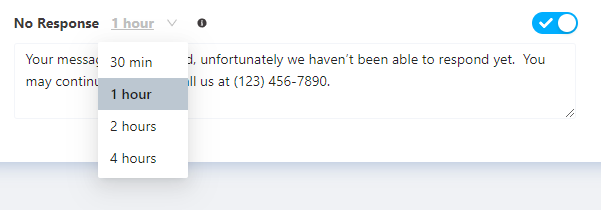
Step 5: Click on the time (default 1 hour) to select a time from a dropdown list. Once a pet parent has sent a message and has not received a reply for the selected amount of time, the no response message will be sent in that chat.
Step 6: If you need to, edit the text of the No Response message.
Need some extra support? We're here for you and can't wait to help!
📞/💬 : Phone: (858) 208-0018
📩 : Email: support@anipanion.com
👩💻 : Hours: Monday - Friday 9 am - 5 pm PST